CPV Lab Pro is a powerful and affordable self-hosted Ad and Affiliate Tracker that can optimize your campaigns, conversions and increase ROI. To setup CPV Lab Pro you don't need to be a programmer. The setup is so simple that you can easily enjoy all of CPV Lab Pro functionalities. You can setup your first campaign in just a few minutes.
STEP 1: Setup Juicyads in CPV Lab
CPV Lab Pro comes with the JuicyAds traffic source pre-configured in the Traffic Sources Catalog pages, so in this case all you have to do is import it from the Catalog.


STEP2: Create a campaign in CPV Lab Pro
In your CPV Lab Pro Campaign Setup page, select Juicyads as the traffic source and choose the Predefined Extrea Tokens that you want to capture.

- Complete all the required fields
- Select your landers and offers (the predefined ones or you can add new ones)
- Save the Campaign
STEP 3: Create the campaign in JuicyAds
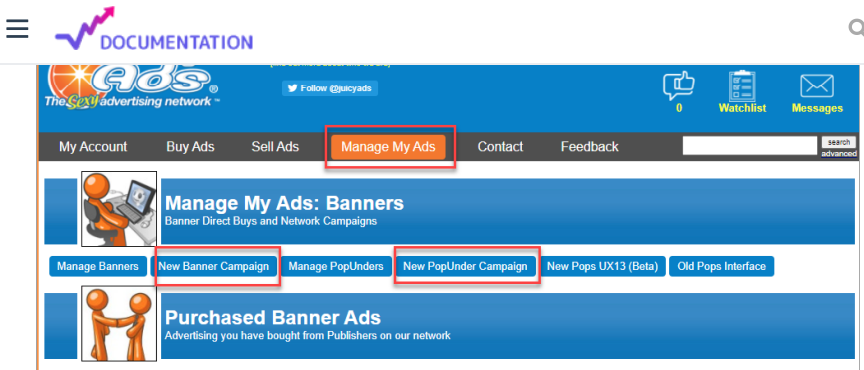
- Login to your JuicyAds Account, and click on "Manage My Ads"

- Select what type of campaign you want to build: Banner or Popunder
- Click on the "New Banner Campaign" button (or on the "New Popunder Campaign")
- Complete all the required campaign fields
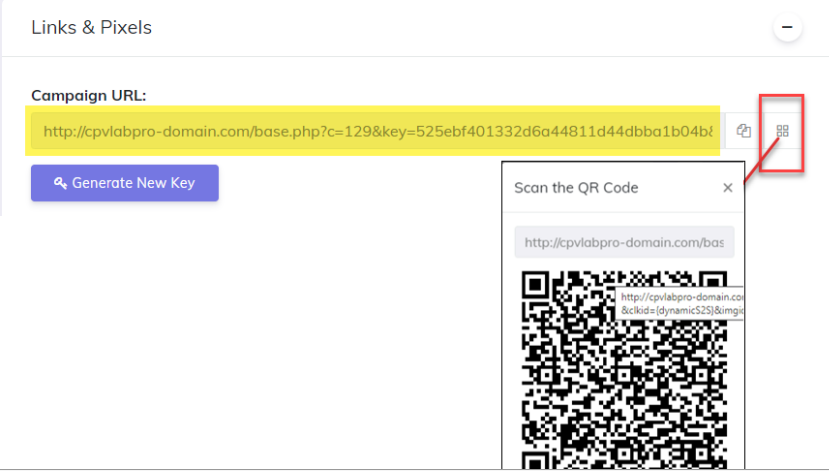
- In the Click URL field, paste the campaign URL from CPV Lab Pro

-
- You can also use the QR code for the campaign URL, if you need to transfer it easily on the phone.

- Click on the "Get Started" button
- On the next screen ("Campaign Settings") you need to fill in the missing fields.
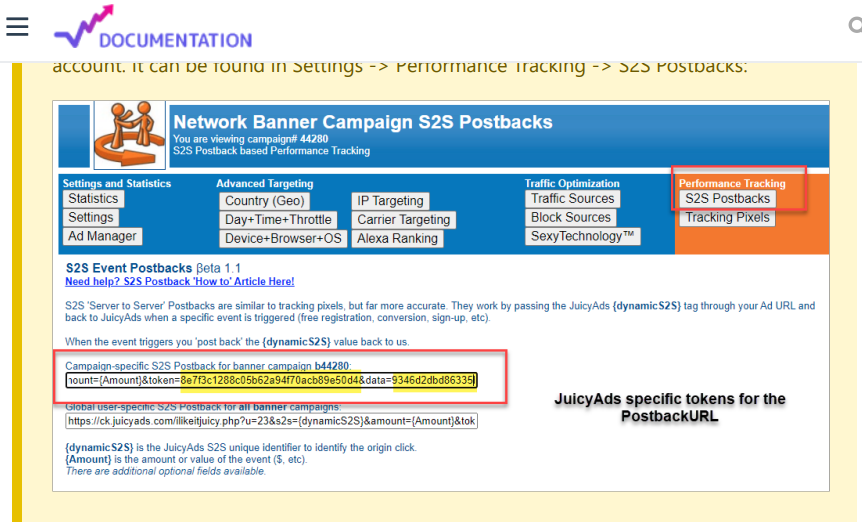
- Go to "Performance Tracking" > "S2S Postbacks" to get the information required for the Postback URL.

Step 4: (Optional) Setup the Postback URL
- In order to track conversions into the JuicyAds platform, you need to setup the Postback
URL from JuicyAds as the Traffic Source Postback URL in the Campaign setup page from
CPV Lab Pro. - The Postback URL should contain the CPV Lab Pro macro {!tscode!} (for Unique Click
ID). And the one for amount, {!revenue} . - The Traffic Source Postback URL will be automatically filled for the selected Traffic Source in
the Campaign Setup page, but you need to select/check it order to have it used (check
image below).

- If the Postback URL is not available (it was not setup or was deleted for this Traffic Source)
then you can enter the following Postback URL as Traffic Source Postback URL in the
Campaign Setup page from CPV Lab Pro:
https://ck.juicyads.com/ilikeitjuicy.php?c=[asProvided]&s2s={!tscode!}&amount=
{!revenue!}&token=[asProvided]23&data=[asProvided]

- So, the Postback URL field in CPV Lab Pro will be like in the image below.
It is very important to keep the parameters for CPV Lab Pro unique identifier ( {!tscode} )
and the one for revenue ( {!revenue} )

- Setup all the other properties for your campaign in JuicyAds and launch it!
0 Comments